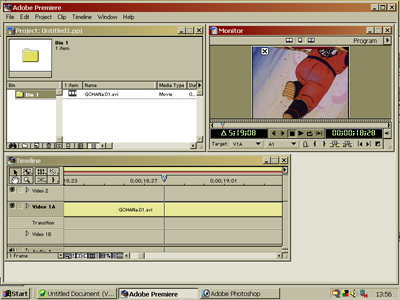
1)The first thing we want to do do is get our video clip into adobe premier. I'll tell you how to import large amounts of files in one go later for now. Lets do the one.
Click File>Open
Find your video clip and open it. Then click on the clip and when a hand appears drag it into video track one.
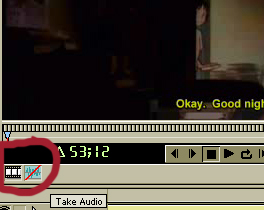
I often prepare the clips for dubbing without sound but in case you use a clip that still has sound we can tell premier not to include the sound. In which case before you drag it into the timeline make sure you click the blue sound icon in the bottom left of the clip so it has a line through like the picture.
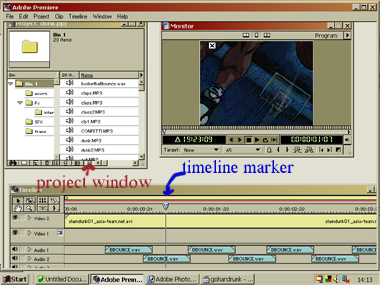
2) The first thing I tend to do is the sound effects. I try to use the original clip for reference of where certain sounds go. I keep many of my SFX in one folder, and you can import many files in one go.
If you click File> Import>folder you can import all the files in one folder together which makes things much simpler. I do suggest you keep voices, music and SFX separated though.
Once imported the files appear in the project window and you can simply drag them into place. ( The folder you imported will appear click on that and you will get a list of the files inside).
I tend to have at least two tracks for sounds. ( you can add more by right clicking on the time line and adding another audio track). To add SFX simply drag them from the project window to the time line.You can also right click on the tracks and change the name in project options.
The timeline marker on the timeline shows you where abouts you are in the video when you play. I use this as a rough guide and rarely use it to help me place sounds.
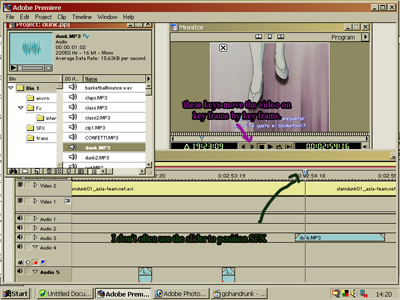
3) The best thing you can do to position SFX is watch the video. Once you are familiar with the video you can often put the SFX in roughly by sight then adjust them as you watch through,
There are keys ( which I marked in move)which move the video frame by frame and I use these to get the SFX in the right place. Once I've moved the video to the place I want the sound to start I can drag the SFX up to the timeline marker.
Keep pressing the play button in the monitor to see the video with sounds so you can adjust it's position.
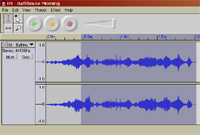
Here I chop of the end of the BGM as it's too long in a separate sound editing program also only want the part that fits the mood!
4) I tend to advise on big projects you mix the SFX and music first so you don't have to keep the voice actors waiting. The trouble can be that the music is too load. I suggest you make separatecopies of all the music you are going to use and put them in a " MUSIC" folder.
Using an audio editer ( I have audacity here) I recommend you edit the music roughly to length. Until you export a movie an adobe project file is like a list of instructions telling premier what to do. So if you edit the file it automatically be that way in premier. This means we can put files in, edit them in a sound programmed and the changes will be automatic. However changing length can cause a problem. That's why I'm doing it first. ( i'll do volume later)I also mention this here as I find editing the volume and length of things easier in a sound edit er than premier (although I will teach you that it a moment ;3). Once we have voices in if the music's too load open up the sound editer and lower it.
Once imported add the music like you would the SFX. If you want more than one type of BGM then use at least two tracks so the transition is smooth.
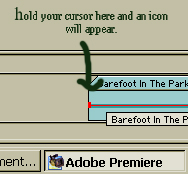
5) If you hold the cursor at the start or end of a file in the time line. An icon like a half a box will appear if you drag that you can alter the length of a file. Like in the picture to the left.
 If you click on this icon
on the left of a audio track. you'll see a line appear. If you click on
the line you can create little points You can then drag the line to change
volume I find it too fiddly.
If you click on this icon
on the left of a audio track. you'll see a line appear. If you click on
the line you can create little points You can then drag the line to change
volume I find it too fiddly.
6) I then add in voices. If I can each character gets their own track. It tend to sync by writing an english script that matches as closely as possible the length of the Japanese line. It's also a good idea to give the VAs the clip for reference. I find editing the video to match messy. It also works surprisingly well!
Pay particular attention to mouth movements ( called lip-flaps) Be sure to start the voice sound a fraction before they start to move.
Keep playing back the file and watch closely. You might want to export a few test files to see how things work.
If the music's too load open it up in your sound editer and reduce it's volume. You might also want to try increasing the voice volume.
Title Editer
Cropping off subs!
7) Got everything right? then lets finish up.
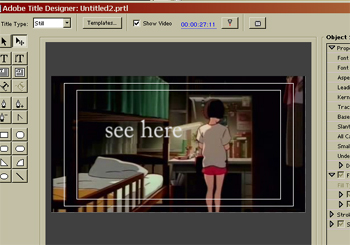
Adding titles:
If you click File> new> Title
You'll get the title editer. Where you can edit fonts, the text and file size. Once your happy with the title exit and premier will create the title. You can then drag it on the timeline. Make sure you put it on video two. It then should be automatically transparent. You can also drag it after the video if you want to add credits.
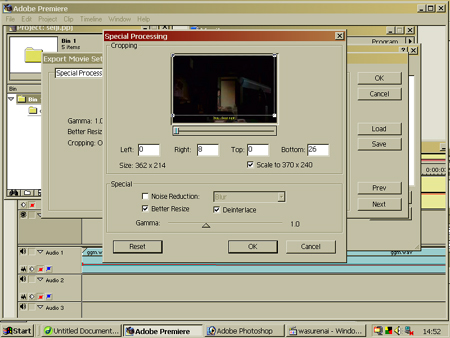
Getting rid of subtitles.
When you export the video
File>Export Time line> Movie>Settings>Special Processes
You can then instruct premier to cut of the subs when it saves into avi format. You can tell premier what to cut off by positioning the window to the screen. But you have to be careful not to distort the picture. So the scale option helps you keeps a conventional size picture,but if the final video comes out odd you might want to turn it off.
Well that's all for now enjoy!